Cloud Storage Config
Captain supports indexing from Amazon S3, Google Cloud Storage, Azure Blob Storage, and Cloudflare R2.
This guide walks through the process of connecting them with Captain.
Choose your cloud storage provider


AWS S3 Bucket Setup
Step 1: Create the Bucket
-
Log in to the AWS Console
-
Navigate to S3 → Buckets → Create bucket
Captain recommends the following standard configuration:- Select a region for the bucket
- Set a bucket name
- Keep General Purpose Storage selected if asked
- Keep ACLs disabled
- Keep Block all public access checked
- (Optional) Enable Bucket Versioning (for SOC 2 compliance)
- Once these settings are configured, the bucket is ready.
Scroll down and click Create bucket
AWS S3 Access Keys
To index files from Amazon S3 buckets, you’ll need an AWS Access Key ID and Secret Access Key.
Step 1: Navigate to IAM Security Credentials
- Log in to the AWS Console
- Click on your account name in the top-right corner
- Select Security credentials from the dropdown menu
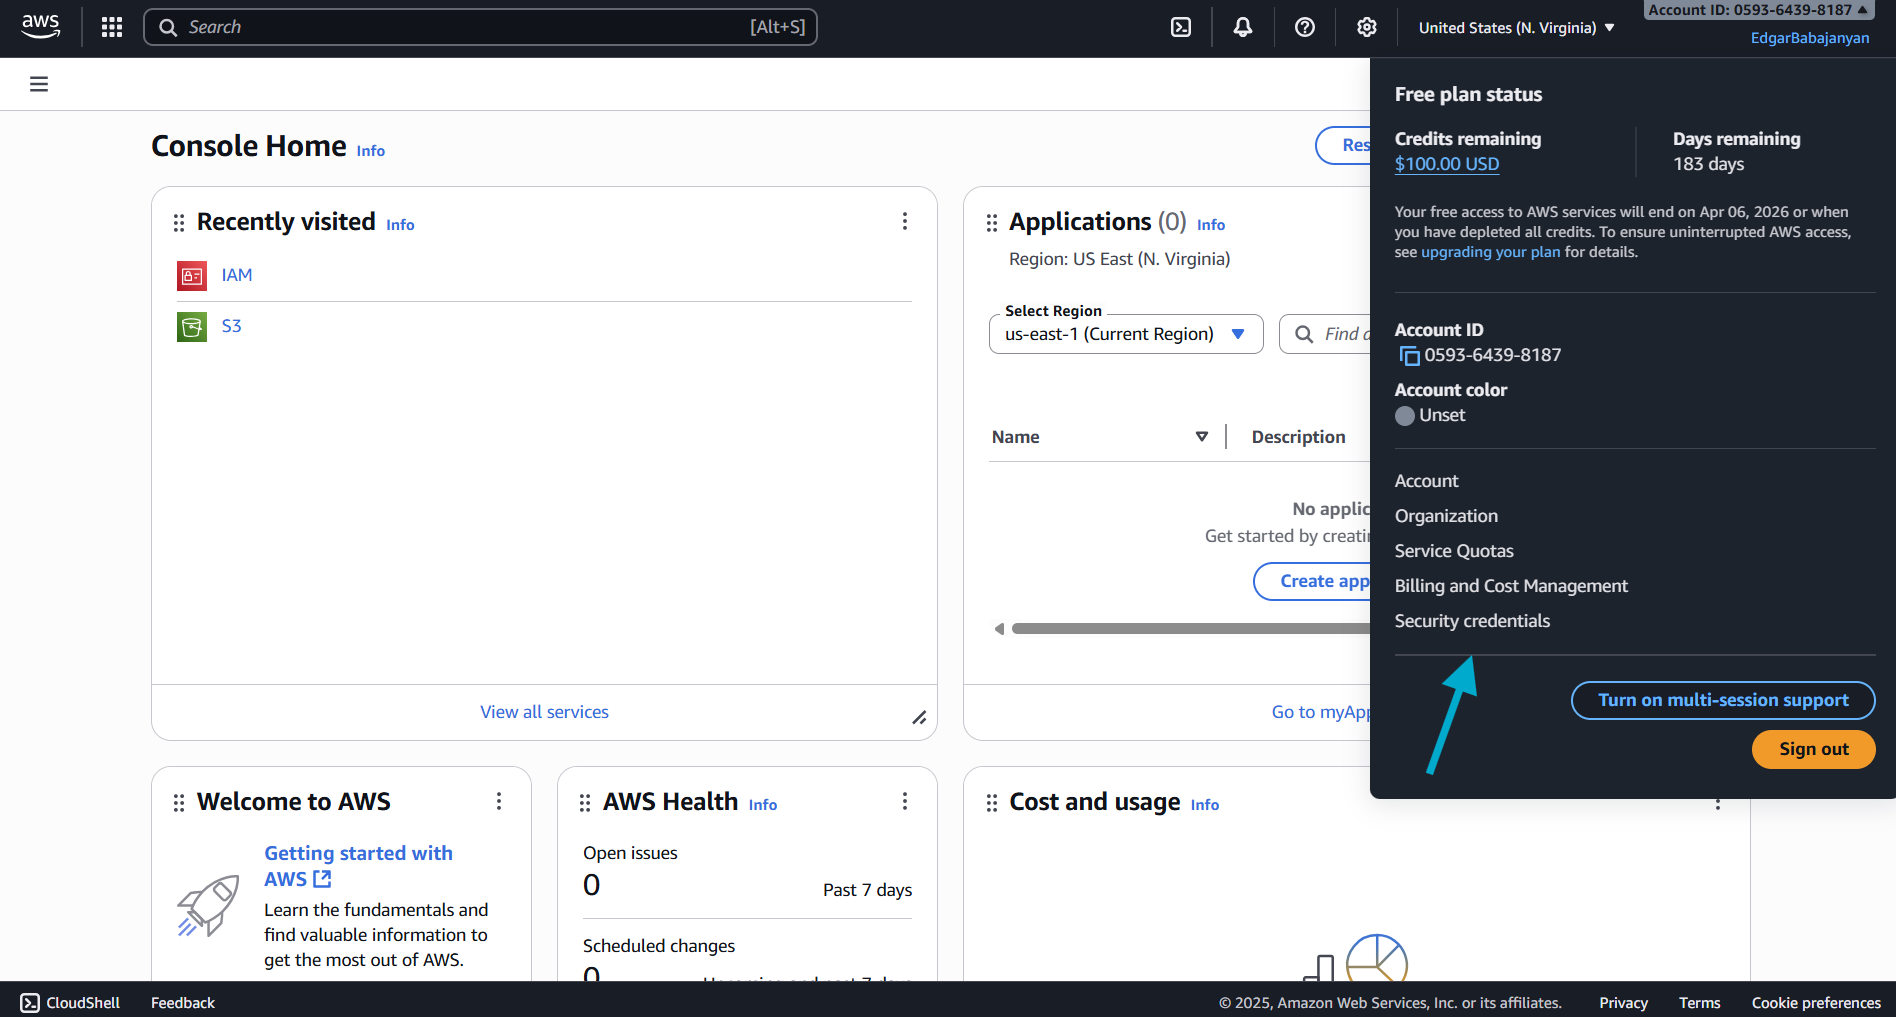
Step 2: Create Access Key
- Scroll down to the Access keys section
- Click the Create access key button
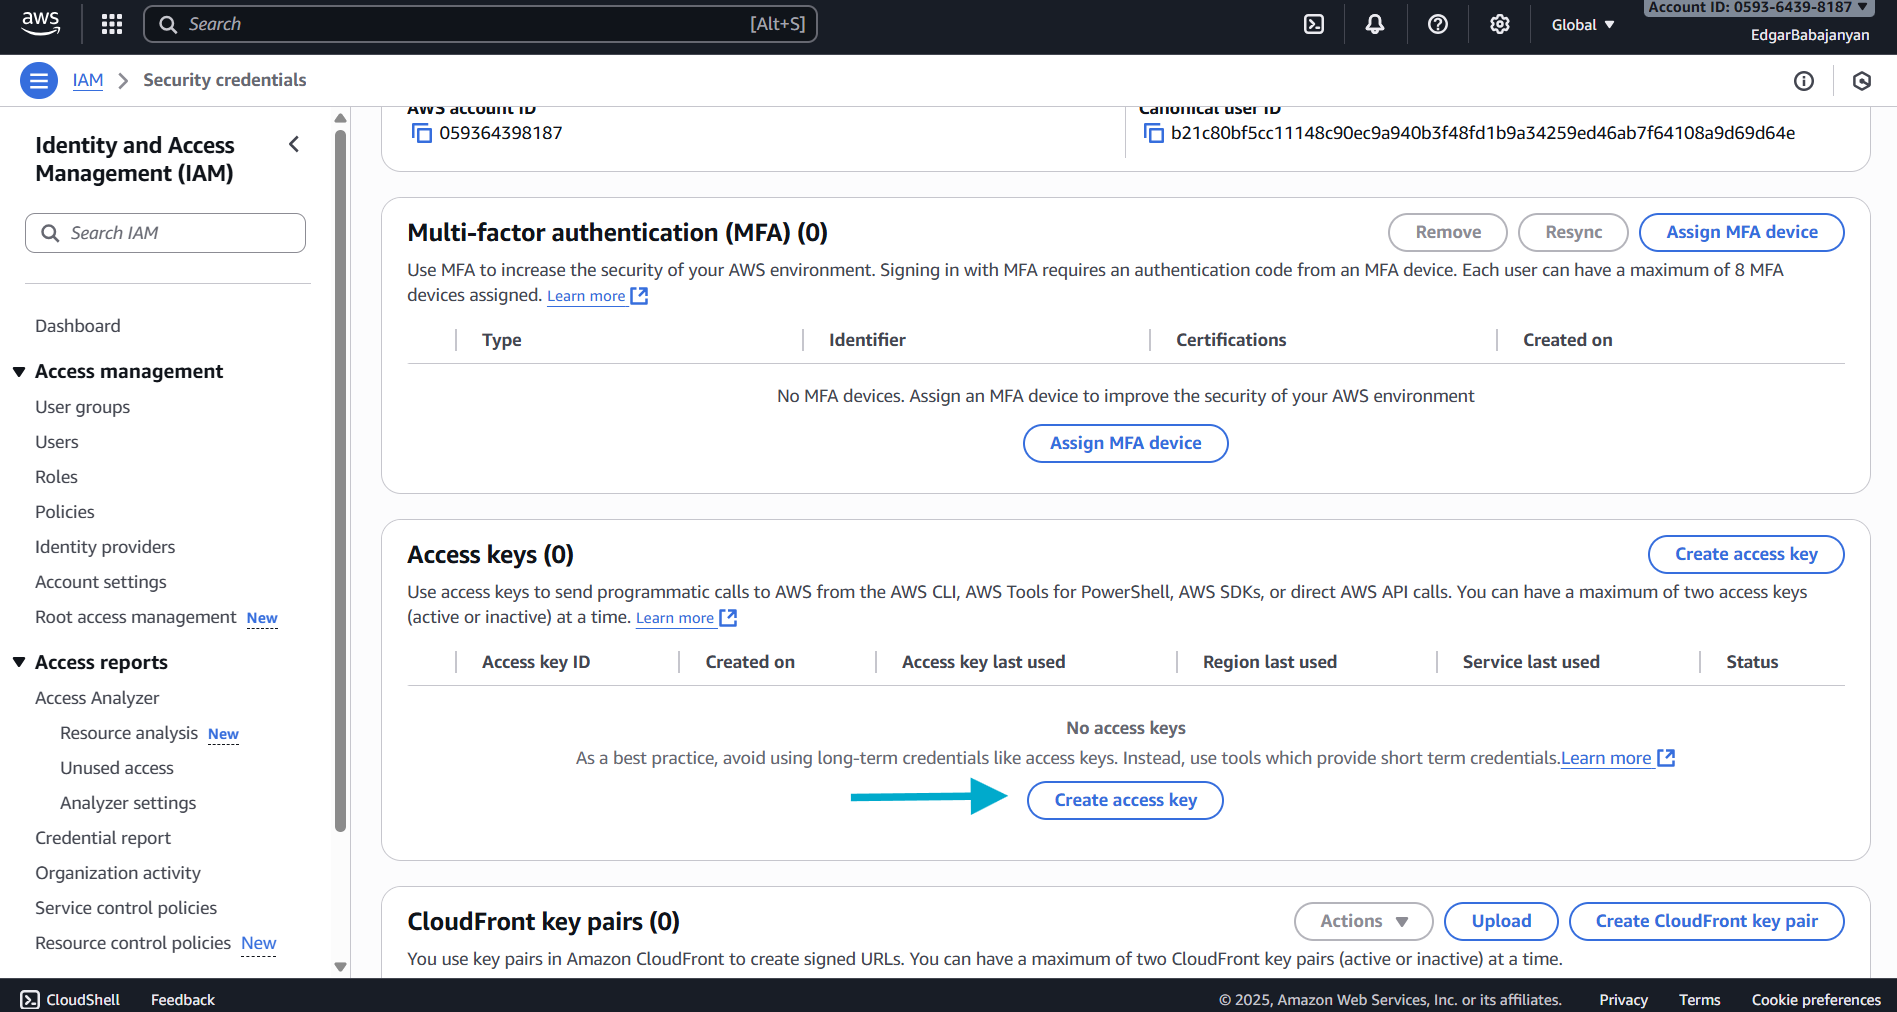
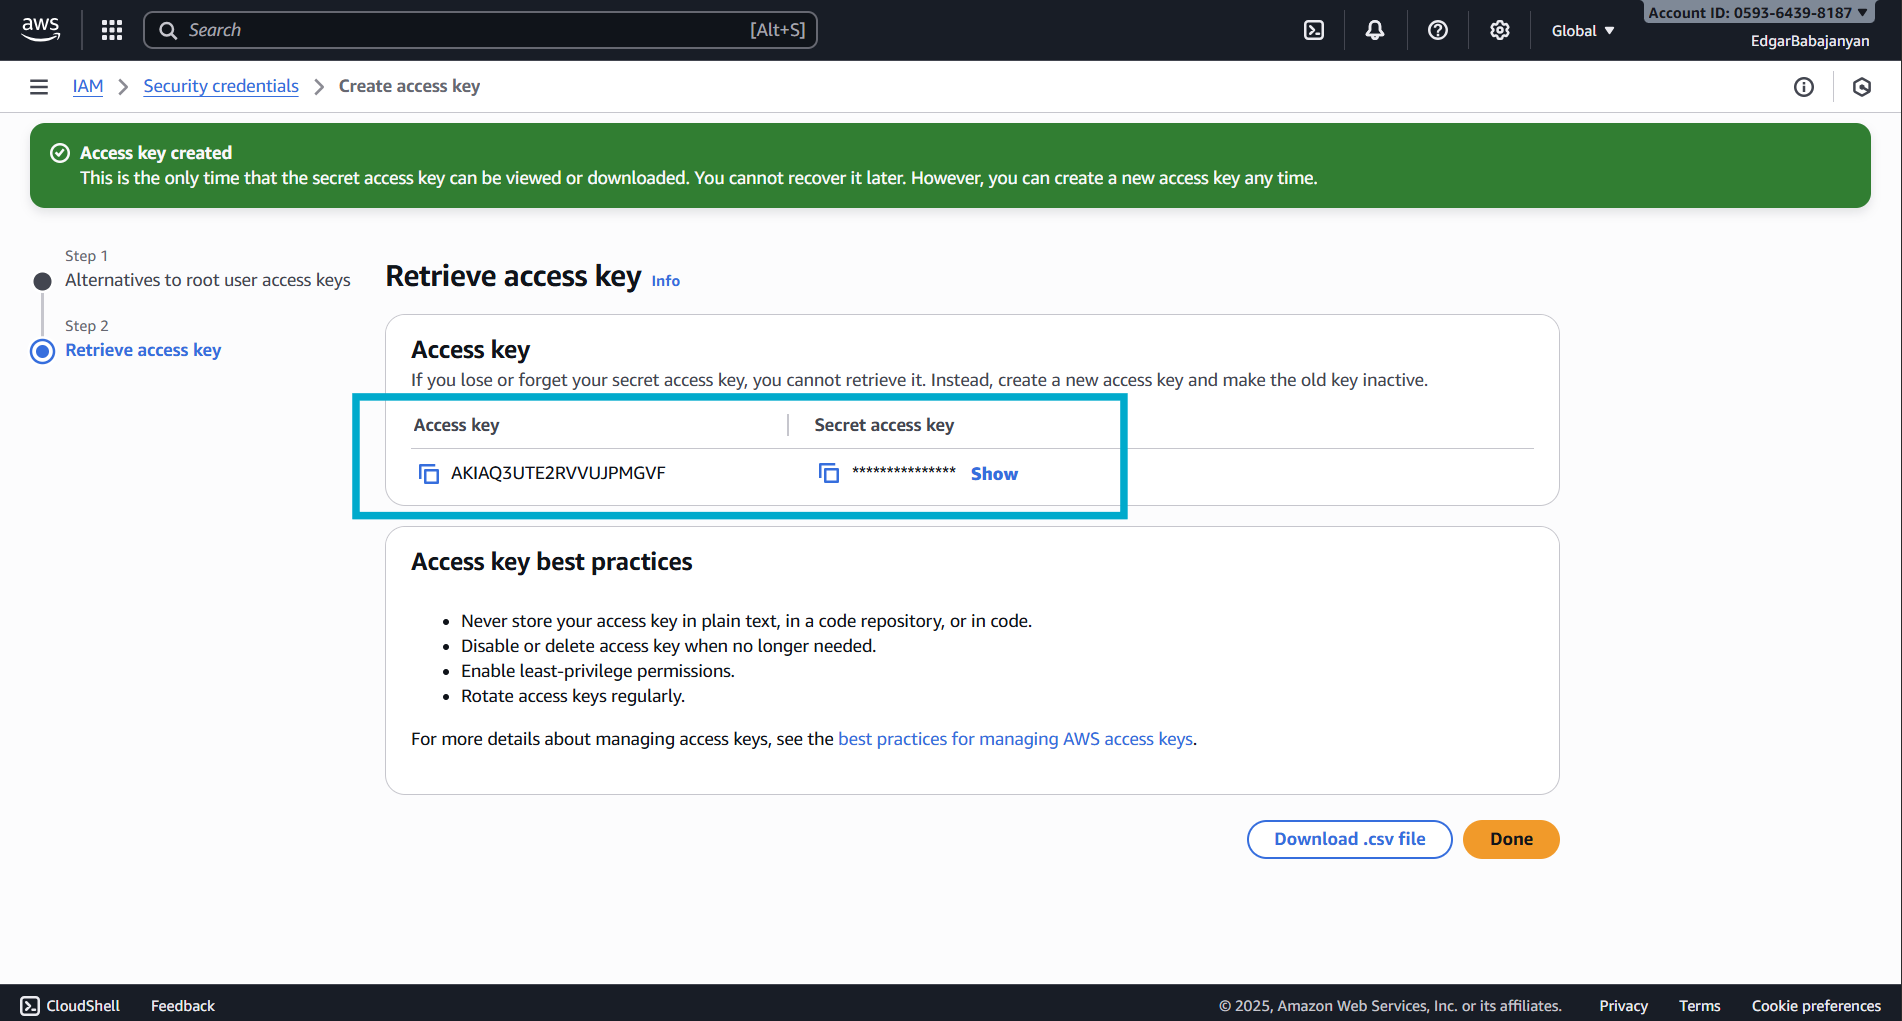
Step 3: Retrieve Your Credentials
- Your Access Key ID and Secret Access Key will be displayed
- Important: This is the only time you can view the Secret Access Key
- Click Show to reveal the Secret Access Key
- Copy both the Access Key ID and Secret Access Key to a secure location
- Optionally, download the
.csvfile for safekeeping
Required IAM Permissions (AWS)
Your AWS access key needs the following permissions to work with Captain:
For read-only access to S3 buckets:
Replace your-bucket-name with your actual S3 bucket name.
Google Cloud Storage Bucket Setup
Step 1: Create the Bucket
- Go to Google Cloud Console
- Navigate to Cloud Storage → Buckets → Create
- Enter a unique bucket name (e.g.,
company-captain-documents) - Select a Location type (Region, Dual-region, or Multi-region)
- Select Standard storage class for general use
- Under Access control, select “Uniform” (recommended)
- Click Create
Google Cloud Storage Credentials
To index files from Google Cloud Storage buckets, you’ll need a Service Account JSON key.
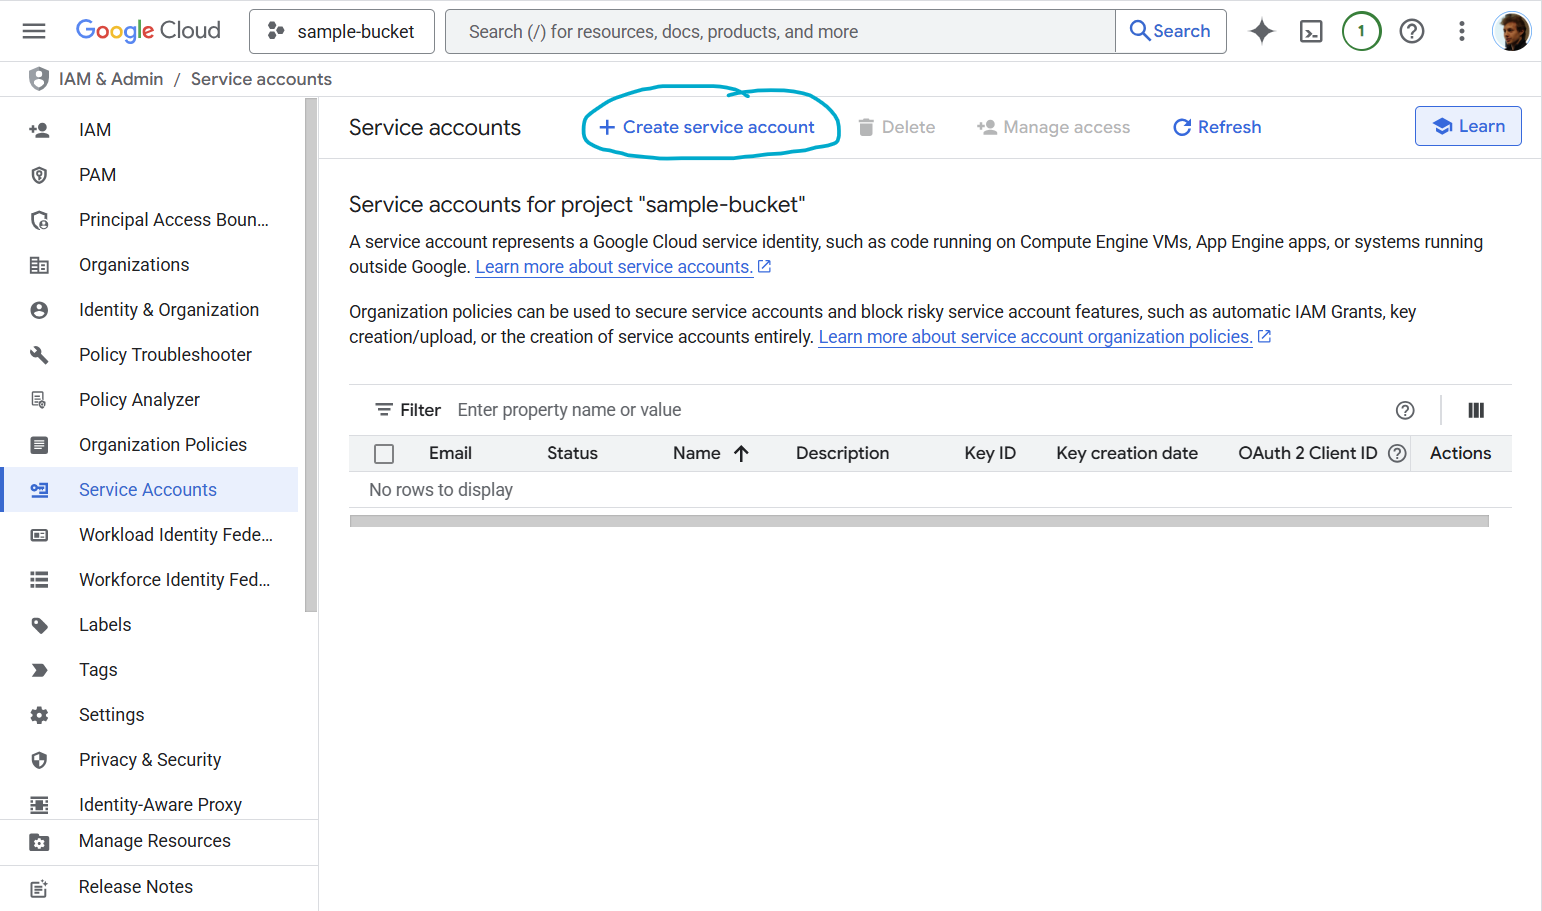
Step 1: Navigate to Service Accounts
- Go to Google Cloud Console
- Navigate to IAM & Admin → Service Accounts
- Click Create Service Account
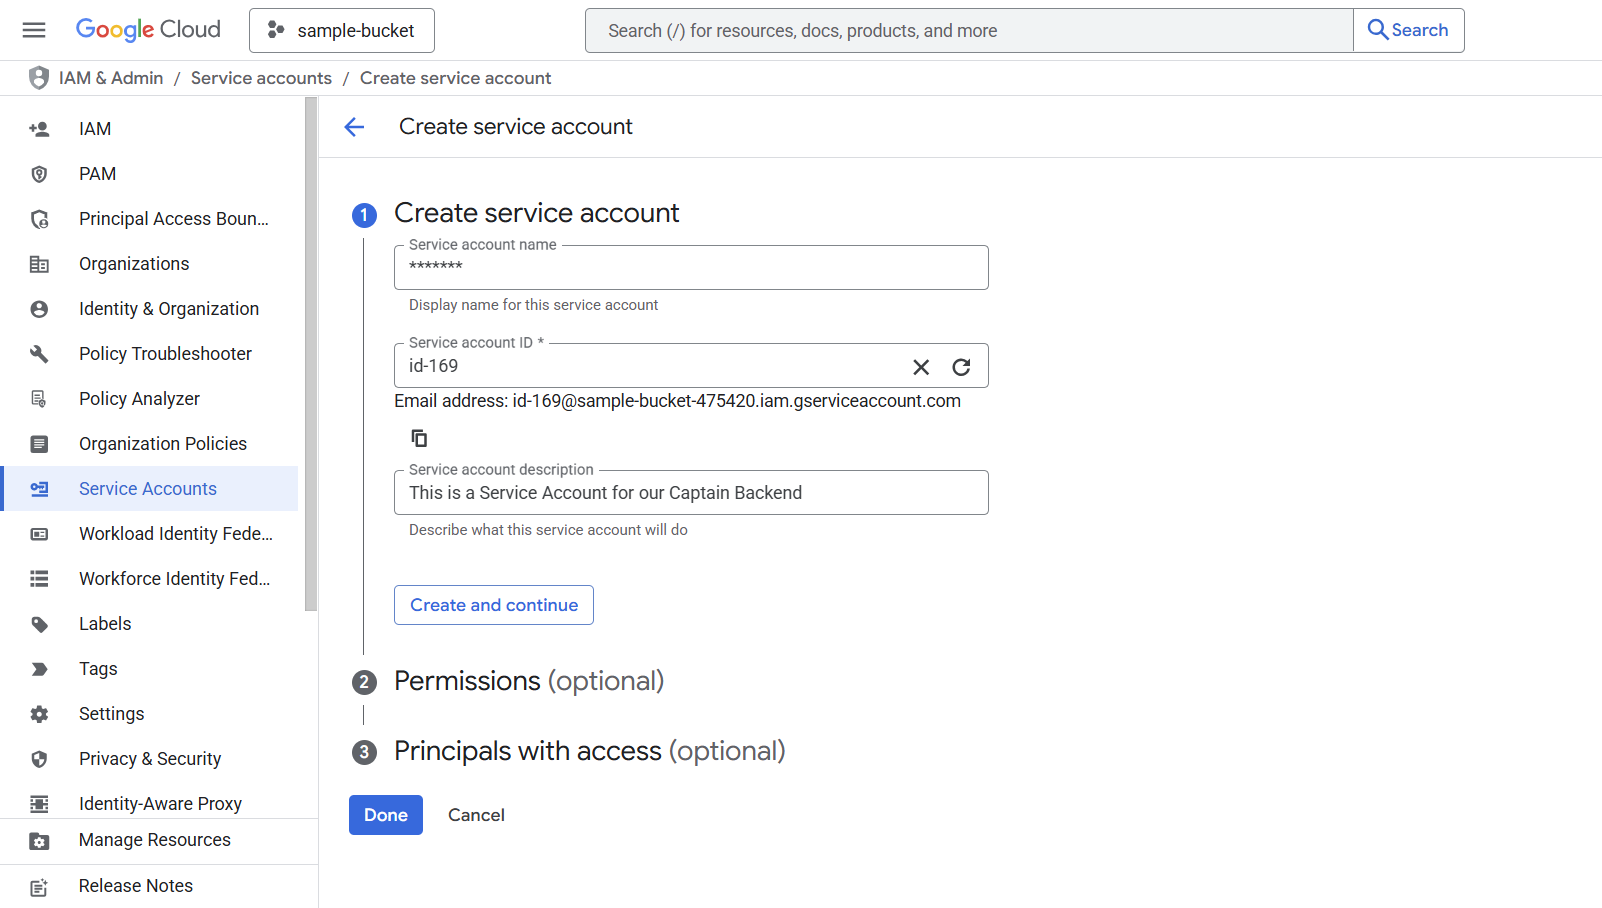
Step 2: Create Service Account
- Enter a Service account name (e.g.,
captain-storage-access) - Add a Service account description (optional but recommended)
- The Service account ID will be auto-generated
- Click Create and continue
Step 3: Grant Permissions
Under Grant this service account access to project, choose the appropriate role based on your needs:
For read-only access to buckets/objects:
- Role: Storage Object Viewer (
roles/storage.objectViewer)
For read/write access:
- Role: Storage Object Admin (
roles/storage.objectAdmin)
For full bucket management:
- Role: Storage Admin (
roles/storage.admin)
Click Continue → Done
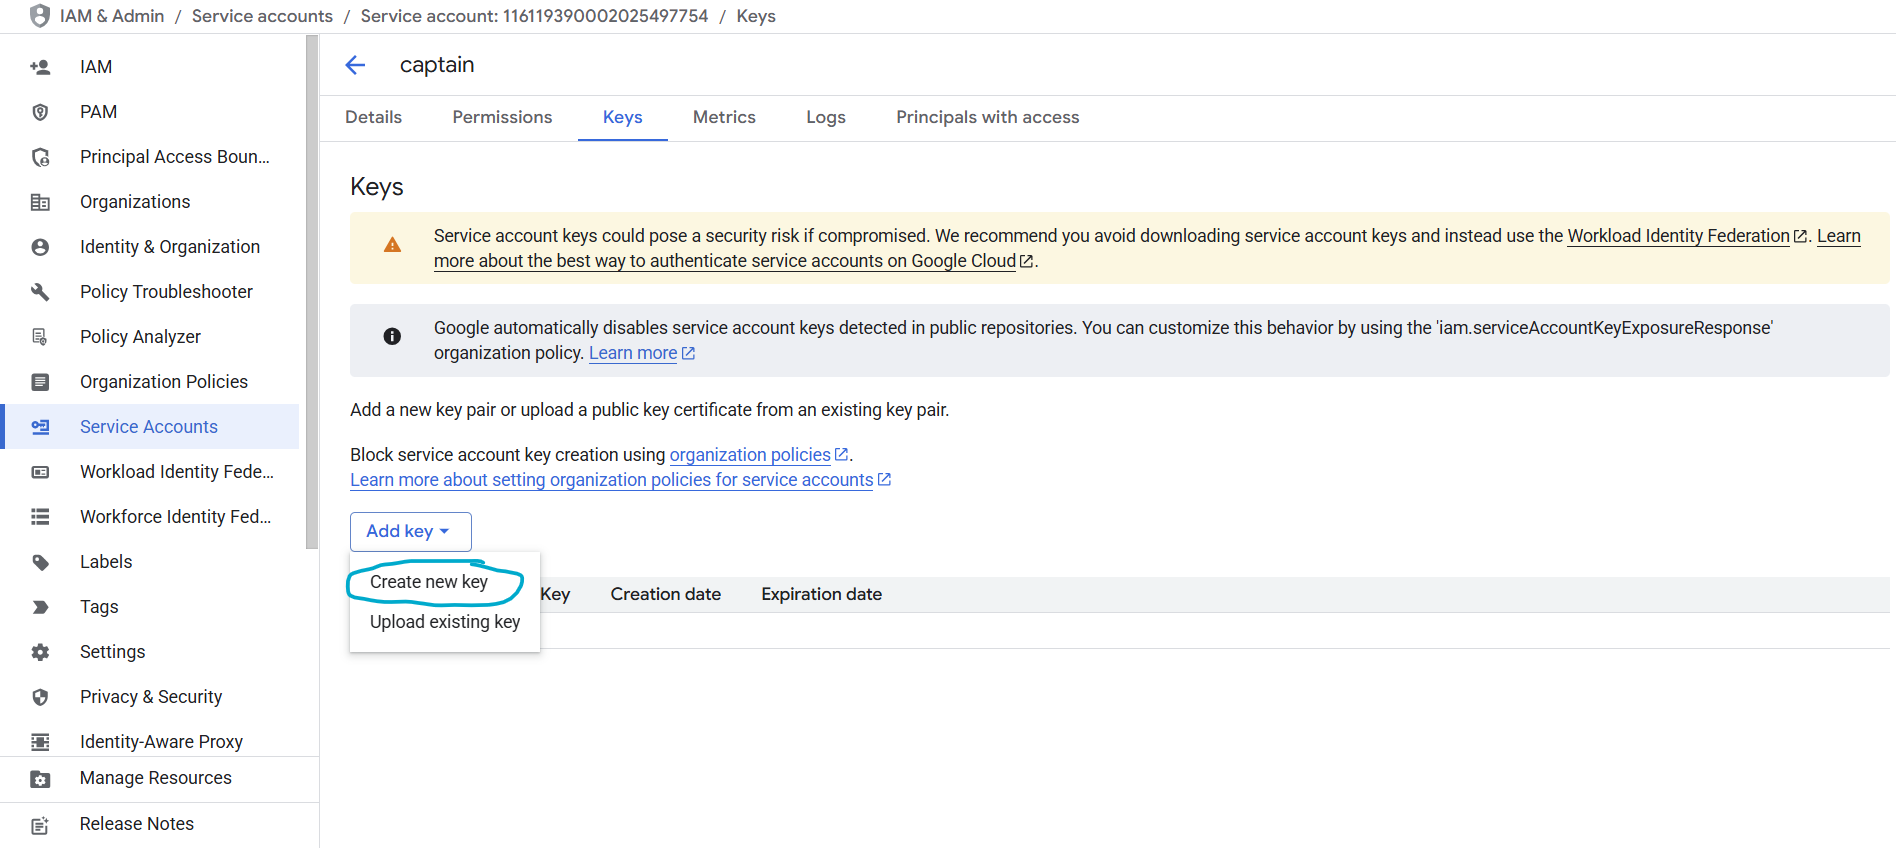
Step 4: Create and Download JSON Key
- You’ll now see your new service account in the list
- Click on the service account name
- Navigate to the Keys tab
- Click Add Key → Create New Key
- Select JSON as the key type
- Click Create
The JSON key file will automatically download to your computer. This file contains your service account credentials.
JSON Key File Format
Your downloaded JSON key will look like this:
Using Google Cloud Service Accounts with Captain
Store the JSON key file securely (e.g., in a secret management service or as an environment variable)
Azure Blob Storage Setup
Step 1: Create a Storage Account
- Log in to the Azure Portal
- Navigate to Storage accounts → Create
- Select your Subscription and Resource group (or create a new one)
- Enter a Storage account name (e.g.,
captaindocuments) - Select a Region closest to your operations
- Select Standard performance and LRS (Locally-redundant storage) for general use
- Click Review + create → Create
Step 2: Create a Container
- Open your new storage account
- Navigate to Data storage → Containers
- Click + Container
- Enter a container name (e.g.,
documents) - Set Private access level (no anonymous access)
- Click Create
Azure Blob Storage Credentials
To index files from Azure Blob Storage, you’ll need your Storage Account Name and Account Key.
Step 1: Get Your Account Name and Key
- Open your storage account in the Azure Portal
- Navigate to Security + networking → Access keys
- Your Storage account name is displayed at the top
- Click Show next to either key to reveal the Account Key (base64-encoded)
- Copy both values
Important: Treat the account key like a password. Store it securely (e.g., in a secret management service or as an environment variable).
Step 2: Use with Captain
Pass the account name, account key, and container name when calling the indexing endpoint:
Required Azure Permissions
The account key provides full access to all containers in the storage account. For more granular control, you can use Shared Access Signatures (SAS) with the following minimum permissions:
- Read — to access blob contents
- List — to enumerate blobs in the container
You can generate a SAS token from the Azure Portal under your storage account’s Shared access signature settings.
Cloudflare R2 Setup
Step 1: Create an R2 Bucket
- Log in to the Cloudflare Dashboard
- Navigate to R2 Object Storage → Create bucket
- Enter a bucket name (e.g.,
captain-documents) - Select a location hint (optional — R2 automatically distributes globally)
- Click Create bucket
Cloudflare R2 Credentials
To index files from Cloudflare R2, you’ll need your Account ID, an Access Key ID, and a Secret Access Key.
Step 1: Find Your Account ID
- Log in to the Cloudflare Dashboard
- Your Account ID is visible in the URL:
https://dash.cloudflare.com/<account_id> - You can also find it on the R2 Overview page in the right sidebar
Step 2: Create an R2 API Token
- Navigate to R2 Object Storage → Manage R2 API Tokens
- Click Create API token
- Enter a token name (e.g.,
captain-read-access) - Under Permissions, select Object Read only
- Under Specify bucket(s), select your bucket or allow access to all buckets
- Click Create API Token
Step 3: Retrieve Your Credentials
- Your Access Key ID and Secret Access Key will be displayed
- Important: This is the only time you can view the Secret Access Key
- Copy both values to a secure location
Step 4: Use with Captain
Pass the account ID, access key ID, secret access key, and bucket name when calling the indexing endpoint:
R2 Jurisdictions
R2 supports jurisdiction-restricted storage. You can optionally specify a jurisdiction parameter:
default— Global (no restriction). This is the default.eu— EU-only data residencyfedramp— FedRAMP-compliant storage
Required R2 Permissions
Your R2 API token needs the following minimum permissions:
- Object Read — to access object contents
- List — to enumerate objects in the bucket
For more granular control, create a token scoped to a specific bucket rather than all buckets.
Troubleshooting
AWS Issues
Error: “Invalid AWS credentials”
- Verify your Access Key ID and Secret Access Key are correct
- Check that the access key is active in the IAM console
- Ensure your IAM user/role has the necessary S3 permissions
Error: “Access Denied”
- Verify your IAM permissions include
s3:GetObjectands3:ListBucket - Check bucket policies and ensure they allow your IAM user/role
- Verify the bucket region matches the
bucket_regionparameter
Google Cloud Issues
Error: “Invalid service account credentials”
- Verify the JSON key file is valid and not corrupted
- Check that the service account is enabled
- Ensure the service account has the necessary Storage permissions
Error: “Permission denied”
- Verify the service account has the appropriate Storage role
- Check that the bucket exists and the service account has access
- Review IAM permissions in the Google Cloud Console
Azure Issues
Error: “Invalid credentials”
- Verify the account name matches your storage account exactly
- Check that the account key is the full base64-encoded key (not truncated)
- Ensure the storage account exists and is active
Error: “Container not found”
- Verify the container name matches exactly (case-sensitive)
- Check that the container exists in the storage account
- Ensure the storage account is in the correct subscription
Cloudflare R2 Issues
Error: “Invalid credentials”
- Verify your Account ID matches the one in your Cloudflare dashboard URL
- Check that the Access Key ID and Secret Access Key are from an R2 API token (not a general Cloudflare API token)
- Ensure the API token has not been revoked
Error: “Access Denied”
- Verify the R2 API token has Object Read permissions
- Check that the token is scoped to the correct bucket (or all buckets)
- Ensure the bucket exists and is in the correct jurisdiction
Need Help?
If you encounter issues obtaining or using your cloud storage credentials, contact Captain support:
- Email: support@runcaptain.com
